 Joanna Florence Makes
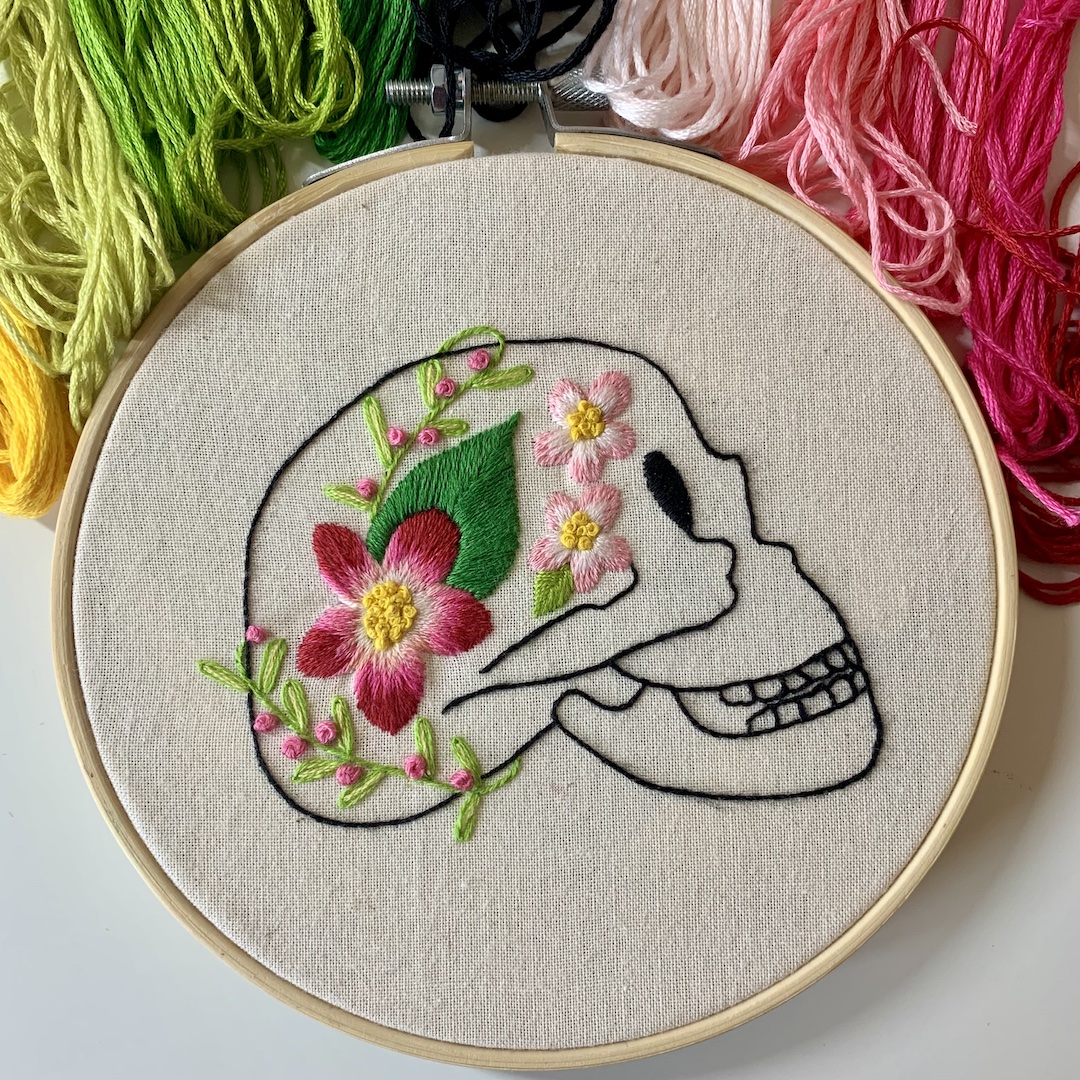
I absolutely love gothic-esque embroidery and I was inspired by the beautiful Mexican Day of the Dead sugar skulls to create this flowery skull pattern. I have stitched it in a 5" hoop on calico fabric but I also think it would look great on a tote bag, on a denim jacket, or as a patch.
You can download the pattern below. To fit the pattern in a 5" hoop make sure your printer does not scale the page, but feel free to scale if you would like the pattern to be smaller or larger.
Flowery Skull Pattern PDF Download
Stitches Used:
- Satin stitch
- Stem stitch
- French knots
- Lazy daisy
- Long and short stitch / threadpainting.
- Straight stitch
- Fishbone stitch
Colours needed: Black, dark pink, hot pink, pale pink, baby pink, yellow, light green, leaf green, yellow-green.
Step 1: The skull
- Outline the skull, the teeth and the facial structure highlights using 1 strand of black thread and very small stem stitches.
- Fill in the eye socket with 2 strands of black thread, horizontally in satin stitch.
Step 2: The vines
- Complete the vines with 2 strands of light green using stem stitch. Add the leaves using lazy daisy stitches.
- Fill in each lazy daisy stitch with one straight stitch using 2 strands of yellow-green.
- Add the pink french knots using 6 strands of hot pink.
Step 3: The large flower
- Work from the center outwards to produce the ombré effect on the petals. This flower uses four different pinks. Start with the lightest pink and work long and short stitches, using 1 strand, from the center to roughly a third of the height of each petal. To create a more natural feel the long and short stitches should not be precise.
- Take the next shade of pink, overlap with the previous shade of pink and work further up to roughly half of the height of each petal.
- Continue to work in this natural way with the next two pinks until the petal egde is reached.
- Fill the center of the flower with french knots in 3 strands of yellow.
- Use fishbone stitch to start filling the leaf, using 3 strands of leaf green. Once you reach the top of the petal, work in satin stitch down each side of the leaf around the petal to complete the leaf.
Step 4: The small flowers
- Work again from the center outwards to proudce the ombré effect on the petals. These flowers just use the two lightest pink colours. Start with the lightest pink and work long and short stitches, using 1 strand, from the center to roughly half the height of the flower. To create a more natural feel the long and short stitches should not be precise.
- Take the next shade of pink and overlap with the previous shade of pink to work to the petal edge.
- Fill the center of each flower with french knots in 3 strands of yellow.
- To complete the leaf on the lower flower, use fishbone stitch and 2 strands of light green.
Please note:
You are welcome to use this pattern for your own personal use. This means you can stitch it in a hoop, add it to clothing or a tote bag, create a patch and gift it to a friend etc.
You are not permitted to use this pattern for commerical use such as reproducing the pattern for sale, reproducing this pattern in a kit for sale, selling finished products that have used this pattern or any other use that results in monetary gain.